January 26, 2019
The Ultimate Guide to Restaurant Photos on Tripadvisor
January 26, 2019
Great photos are the key to standing out in today’s crowded restaurant market. Here’s our ultimate guide to showing off your restaurant and your cuisine with photography — no professional needed.
On Tripadvisor, restaurants with more than ten photos often have significantly greater engagement — almost double, in fact — from hungry browsing diners. And restaurants with at least one Management Photo see 44% more engagement than those without. Adding photos to your listing is one of the easiest ways you can encourage more people to come to your restaurant.
Your photos will appear in the photo carousel at the top of your listing, and your Primary Photo will appear next to your listing in search results. Tripadvisor Premium subscribers can also create a dynamic visual slideshow and create a set of up to ten Featured Photos— learn more about Premium here.
Taking great photos of food and your restaurant doesn’t require a professional or even a nice camera. Most smartphones today will do nicely with the right lighting and composition.
Before you pick up your camera, think about what you want to feature about your restaurant. You’ll want a variety of shots of the seating, the decor, your storefront, and your food. Is there anything unique about the space, like an open kitchen or a stage for live music? What about your awesome staff or outdoor seating? Those are great aspects of your place to feature.
Think about what you want to feature to determine when you’ll take your photos. Ideally, you’ll want shots of your restaurant when it’s full and bustling — but if there’s no time during a service, don’t sweat it. The most important part of restaurant photography is showing your restaurant at its best, and if your busy dinner service offers dim lighting, this might mean a less compelling photo anyway.
If your restaurant typically has mood lighting or harsh overhead lights, take pictures during the day of your cuisine using natural light from one of your windows or invest in a small photography light. Avoid flash, heavy shadows, or direct sunlight as it can wash out your subject or cast shadows in the photo. You’ll have to play with different times of day based on how the light looks in your restaurant — and with curtains if you have them to diffuse the light.
When taking photos of your restaurant’s interior, don’t try to get a picture of everything all at once. Pick individual elements and make sure there’s plenty of empty space around your subject. Your goal should be to give potential diners an overall vibe rather than a prescriptive tour of the place.
For your cuisine, let your mise-en-place shine. Double check that dishes are clean and the surrounding setting appealing before starting to take pictures. And don’t forget to take the majority of your photos in landscape mode — longer than it is tall — to optimize for sites like Tripadvisor.
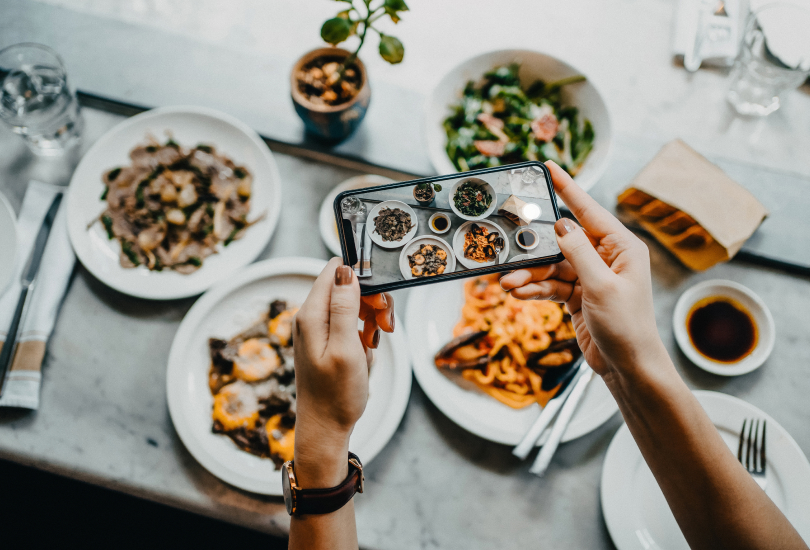
For the classic overhead shot of plated cuisine, you’ll want to get up on a chair and take the photo with a single plate in the center or multiple plates arranged deliberately. Think about shapes and color more than the individual items of the dish. Add table settings or silverware where appropriate, and go for contrast between the colors of the dish, the plate, and the table. Keep the background neutral if you can so the dish really pops, and experiment with adding hands or arms into the photo — though for that, you’ll likely need another person to help.
Another popular type of food photography is the “food in the air” shot for more on-the-go items. This works best with two people, one to hold the food item and one to take the picture. Find a neutral background or wall of your restaurant (or a brick wall nearby) to showcase food that is easily held — think smoothies, fun cocktails, coffee, ice cream, or other to-go items like sandwiches or waffles.

When it comes to composition, think about what makes someone’s mouth water. Try shooting subjects from the side, especially items with layers. Cut a savory menu item like a burger in half to show off the ingredients or ask a staff member to pull apart a gooey grilled cheese. If you have a layered cake or other sweet dessert, do the same to show off the layers or the melty chocolate confection you’ve created.
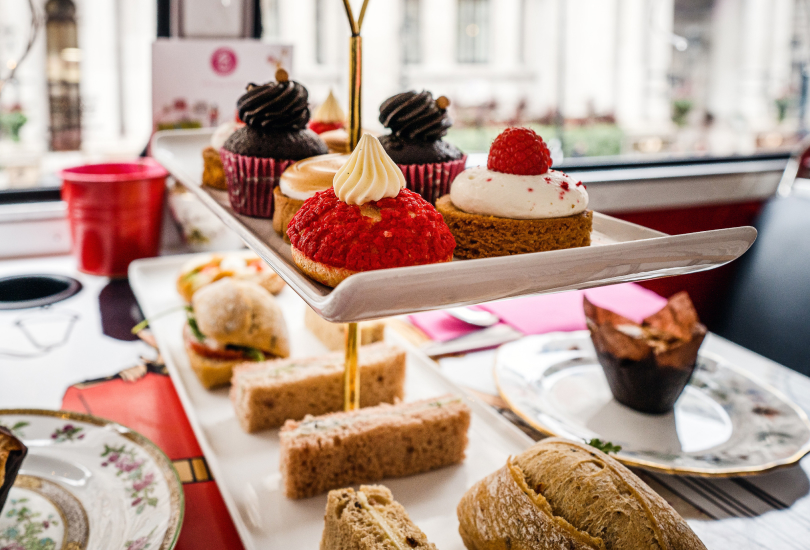
Another option for composition is to shoot your subject diagonally. You could arrange a tray of cupcakes or a colorful salad to show both the side and the top of the menu item. Mix up portrait and landscape orientations to see how that changes the shot.
Whatever you’re shooting, make sure there’s a little bit of empty space between the subject and the frame so that the focus is on the food itself. Keeping it simple will yield the best results. And most of all, have fun with it! You’re showing off your hard work and what makes your restaurant special — don’t be afraid to experiment with different kinds of photography.
There’s plenty more shots you can try:
While you don’t need a fancy camera or the services of a professional, a few smaller gadgets and apps on your phone can help you take great photos year-round that you can use on your social media profiles, on listing sites like Tripadvisor, or in your email marketing.
Think about:
Be sure to include the original image from your camera or phone to maintain the best possible quality. Depending on what kind of camera or phone you have, you may need to invest in a card reader, USB cord, or a file sharing app like Dropbox or Google Photos so that you can easily transfer your images from your device to your computer to upload them.
Whether you’re uploading these photos to social media or on Tripadvisor, include photo descriptions that provide context about the photo. Keep it short and sweet — a brief description of the dish or the decor elements will do nicely. Stick with your brand and how you’re already talking about your menu and restaurant across the web.
To add photos to your Tripadvisor listing: